
Farmhouse Kitchen Renovation: Part 2
Yes, I'm way overdue for a Farmhouse Kitchen update. As many of you are well aware, we're now two months into our farmhouse kitchen remodel. As much as I wanted to take a sledge hammer to it all the moment we moved in, eventually I submitted to at least getting boxes unpacked before we starting eating that elephant. But seriously. Carpet. CARPET IN THE FARM KITCHEN. Bleh. As you'll remember from the first renovation post I did a few weeks back, we spent an entire week ripping up that carpet and over 4" of subfloor underneath it. What we found was more subfloor... but this subfloor was pre-OSB. Read: this subfloor was wood planking. I know it ain't everyone's cup of tea, like the painted subfloors in our living room, but I love these planks. And considering this kitchen serves as a laundry/mud room (don't worry... we'll be covering the washer and dryer soon enough!)... and considering we have four dirty children running through the door a thousand times a day... it seemed a good fit to keep a rustic, worn, hard-core floor like this. We covered it in a custom white blend from Benjamin Moore. I made my niece, Sawyer, show you just how wonderful it looks. Ain't she something? Sweet thang.Yes, there are gigantic cracks in between the planks that fill with dirt and crumbs - I vacuum them out every few days before mopping. There are also a few small holes in the flooring and you can peep down into the root cellar right from the kitchen floor. Classy, no? For me, it's perfect.
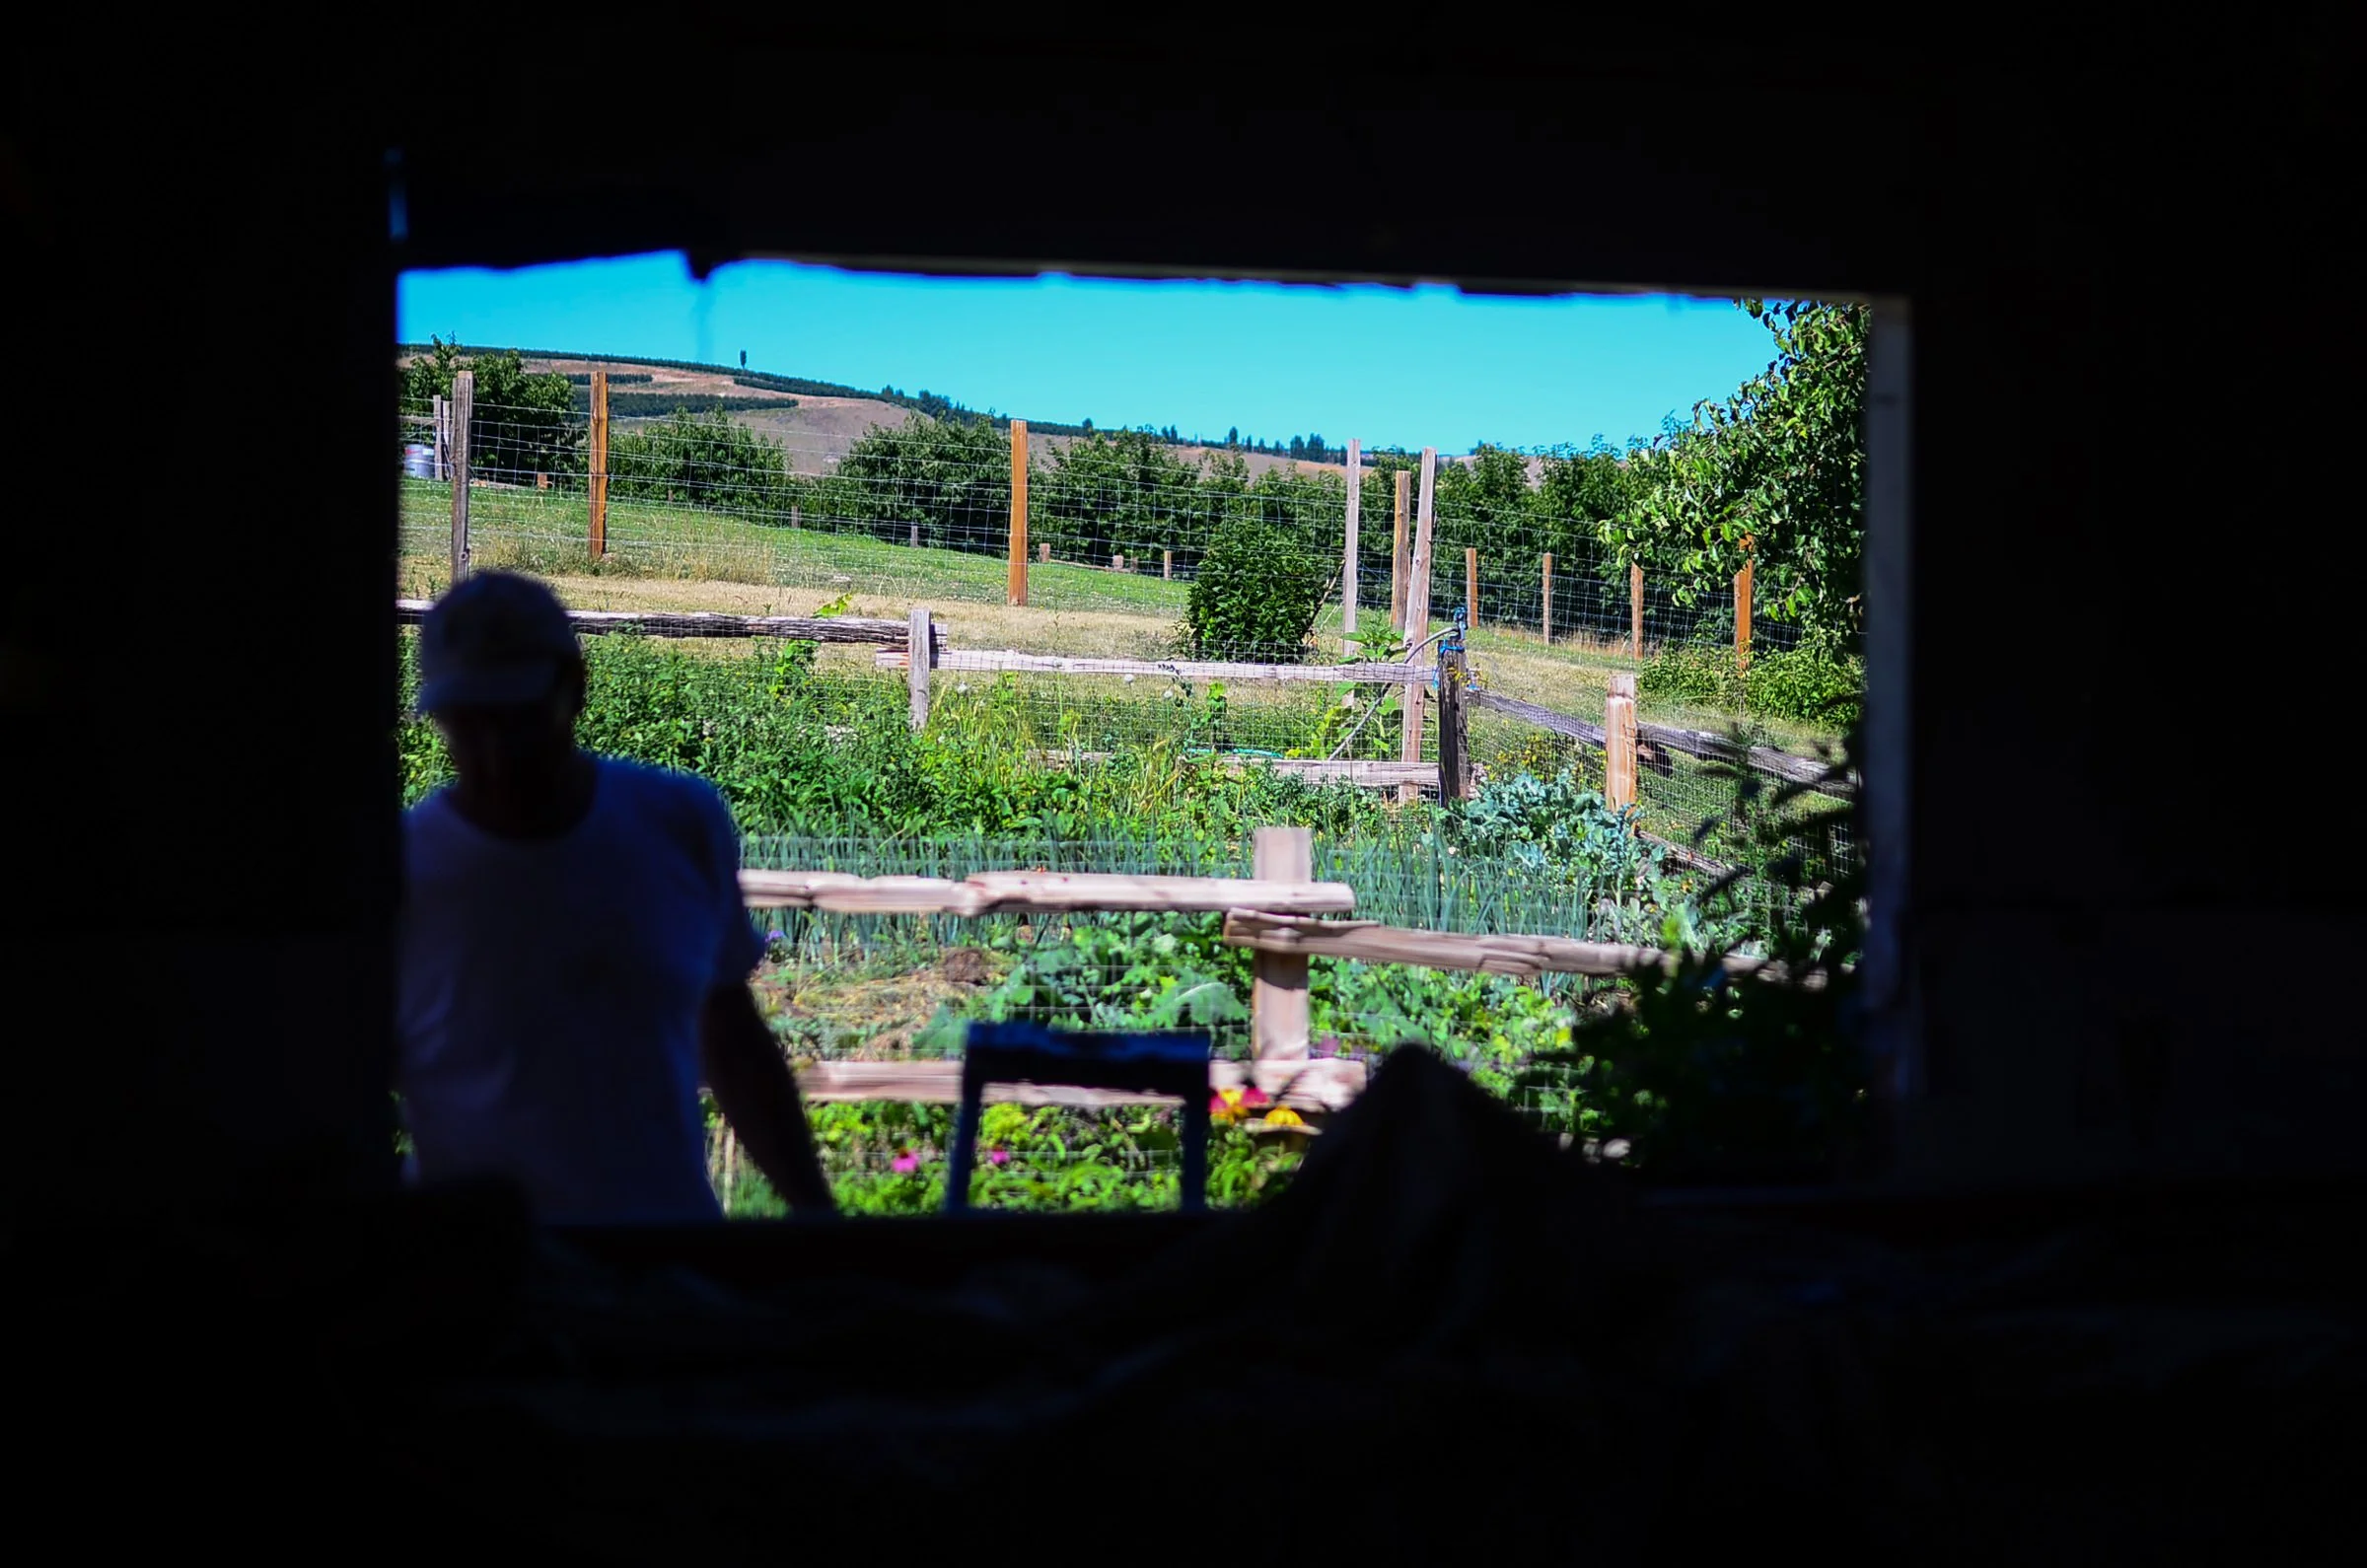
 Do y'all remember that teeny little window above our (soon to be ripped out) kitchen sink? It was essential to me that we bit the bullet and replaced that with a much larger window. Windows are expensive but the light and life they bring to a room is invaluable. So we hired our good friend Jim to come and do the dirty work.Oh, hey Jim's silhouette!
 THAT is the view from my kitchen window. Right? RIGHT?! Can you see now why it needed to be bigger? That's our potager garden not 10 feet from the kitchen window. And beyond that is the pasture the sheep and cows graze on and off through the spring/summer/and fall. I'm a big believer in bringing outdoor spaces in and indoor spaces out. Because we practically live outside three seasons a year, I love to think of ways that it can feel less "here" or "there" but instead feel unified no matter where you're at on the farm.
  Here is the window, all installed. It's lovely! The sides crank open out to the garden so it can be completely open. Oh, man. When it's not seven thousand degrees outside, I'm totally going to leave them open all day long. But since it is seven thousand degrees outside, I've decided instead to sit with ice packs all over my body, hose down my pigs no less than twelve times day, and be glad that in the heat, at least that tomatoes will turn red. The moral of the story is this: always bigger windows. Always. We replaced the one opposite this one as well with a matching window.
 There's Jim again. Hi Jim! Also, don't judge my stairway and weird porch thing. It's all being ripped out at the end of summer for a major overhaul. The entire house is stucco so you can see how much fun Jim was having widening the window frame. So much fun, yo.I made him a few good espressos to makeup for the tedious task of ripping out stucco and chicken wire. Will work for espresso! Or maybe that's just me...Now... moving on from the windows...Below the sink and counter that currently need to be replaced (we'll get to that once Stuart completes his sermon on Sunday and finishes his Master's midterms and I get my manuscript turned in and all that jazz), are the only remaining cabinets left in the kitchen. If you remember with me, they looked like this:
 Yuck. I hate you 70's faux wood cabinets! You don't inspire me at all! See that emerald green on the right hand side? That was my handy work as I was taking a few special colors for a test drive. This one was the winner. Two coats followed by a dark finishing wax (this wax is my drug of choice and deserves it's own post entirely!) that gave the cabinets a depth and distressed vibe - perfect for the feel the kitchen will have. Eventually. Don't rush me! Art takes time!To combat the flat surface of the cabinets, which lacked any sort of depth or visual interest, I bribed Stuart (with more honey meringues) into creating a square on the surface of the cabinet face with cheap-o trim. Seriously, I think it cost $2.12 for 6 feet of the trim. He cut 45 degree angles on the corners and pieced it together like so:
 I then followed behind him and painted and distressed the trim to match the cabinet. It reads to the eye as "one piece", but has an element of texture and interest that was missing before. Bless the man's heart, after he finished doing that, he created a frame for the dishwasher as well. I'm hoping the kitchen will have a nice, old world feel to it and having a gigantic white dishwasher in the middle of my antiqued and distressed cabinets was messing with my juju. Also, this super old dishwasher works wonderfully so to replace it with a stainless steel one purely for aesthetic purposes seemed wasteful. See the large cover to the left of the gaping hole under the sink that will soon be filled with cast iron farm sink awesomeness and a sweet little farm curtain but for now is a gigantic gaping hole that shows my nasties for all to see?How's that for a run on sentence.
 Lets move on to more nasties. How about the offensive nasty lines on the ceiling from the old cabinets! This'll be enough to make you want to seriously scrub some nasties.Nasties.
 What's a girl to do? She's gotta retexture, man. Because those lines aren't just scum lines - they're crusty lines. So after a bit of sanding and scrubbing, I had a stucco guy come and look at the project. We chatted. Dare I say, we bonded? And then he never called me back to give me a price on the project. So I'm like "Hey dude. Remember when you came over and looked at my stucco walls and we talked about freshening up the stucco? And we talked about coffee and wine?" - silence. "And then we talked about our kids and such and how awesome all these stucco walls are that you were going to refinish?" - silence. Whatever, dude. I'll do it myself.
 And by stucco, I mean make-shift stucco. The walls are solid as an ox and needed no structural fixing. The cabinets revealed a beautifully textured stucco wall behind them - unfortunately, the rest of the walls were nasty 80's texture that I despise. Texture of walls bug me. So I fixed it with another great S.O.S. from my friend Angela - joint compound. $12 a box and a plaster thing-y and I was able to completely retexture the walls and fix the weird lines.By "we", of course, I mean Stuart. Just assume from now on, in any remodel post, that's what I mean. Because - hello! - I'm mostly brains and no brawn.
  See the nasty texture up top? And the much cooler texture down bottom? That's what I'm talking about baby - now we're cookin' up in hizere! Vintage french wine cellars don't have spray on texture. It's not allowed.
 You can see the finished product a wee bit better here. This is after it's dried and been painted with my go-to Revere Pewter that covers almost every wall in my home. Except for the circle around my new hanging light because, obviously, that would just be too nice looking for our kitchen at the moment. As would painting all the walls at once. Because with four children, come on people. I'm working my way through this kitchen one square foot of paint at a time.
  "Mom, can I help? What are you doing? I want to paint. I want to PAINT! I WANT TO PAINT! Mom, can I have the brush please? Mom? Mom! MOM! MOMMMMM!!!!!!!!!!"It's sorta like that.
 Love 'em though. They slow progress but they sure are cute. Sometimes. Lest you think I'll keep this kitchen remodel series going for the rest of my life and never actually complete it, here's a little shimmer of hope (P.S.: Whenever my parents come to visit they bring a gigantic bottle of wine. Don't judge me.):
 Eek! The red, fir shelves are 2" thick and were custom cut for us by a local saw mill. I love them so much - even after the three sanding sessions and seventy million coats of wax we put on them to protect the wood. Again "we" meaning... well, you know.
 And last but not least, the rounded door and new window! Again, Jim was kind enough to help us install both of these since it was just a wee bit above my skill level. More like a zillion wee bits above my skill level. The door still needs to be stained, have the hardware (antiqued iron brackets and nail heads!) pieced on, and have the new door knob installed. But hey, at least it's in place! The finish work and trim will be soon to follow. Can you see where I'm going with this farmhouse kitchen? Hang in there with me, my friends! This is going to be gooooooood!